Showing posts with label Baked goodies. Show all posts

Monday, November 9, 2015

Filo vegetable turnovers


 Our most recent weekend was filled with visits to the beach and the parks to allow our toddler to venture into the outdoors.  It feels good to be settling into these cooler autumn days.  Now that barbeque season is upon us, the number of people carrying their picnic baskets and barbeque stands were many. We were out soon after our Friday prayers as we had decided to have a picnic lunch and then spend some quality outdoor time at the sea side. The weather was simply glorious. The breeze was heavenly and all the stuff we had cooked and carried from our homes gave us enough to make this weekend a fun affair.

Happy fall, my friends! We also have planned a barbeque shortly and I will write about it once it is done. 

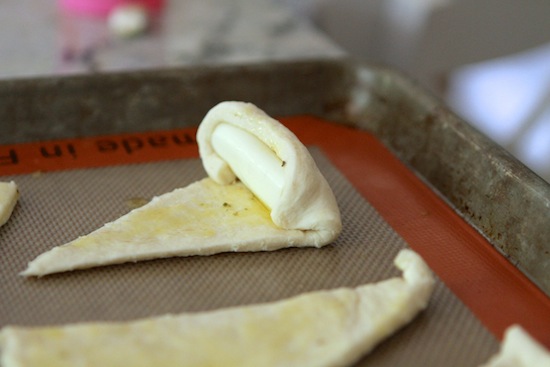
Our picnic basket needed our favorite finger foods and I went on to make these filo turnovers as I had them in my mind since a while. I just used the veggies which I had in my refrigerator. You can add some meat also if you like. Feel free to play around with the shapes and the stuffing. These are something that can knock at your creativity doors. So pour in your ideas and make your meal an enjoyable affair.

INGREDIENTS:

6 sheets of Filo Pastry
100 gms butter
2 large carrots grated
3-4 leaves chopped spinach
6 large cabbage leaves chopped into ribbons
1 clove garlic , minced
1 onion, sliced
1 tbsp. flour
Salt and pepper to taste


HOW TO MAKE:

1) In a large pan, heat 25gms butter. Saute the onions and garlic in this for 2-3 minutes until they soften and start to brown.

2) Add in the spinach and the carrots and sauté for a further 3 minutes and then add some salt and pepper.

3)  Add the cabbage and cook until it is wilted and all the ingredients are mixed well together. Remove from heat.

4) Preheat the oven to 200 degrees Celsius.  Take 3 sheets of the filo pastry and place onto a lightly floured work surface.

5) Melt the remaining butter in the microwave. Take one sheet of filo pastry and brush it with butter across the whole of its surface. Lay another sheet on top and coat it with butter. Lay the third sheet also on top of this and brush with some more butter. Then turn the whole over so that the floured side is upwards.

6) Cut the filo into small circles and then fill each one with the vegetable mixture.

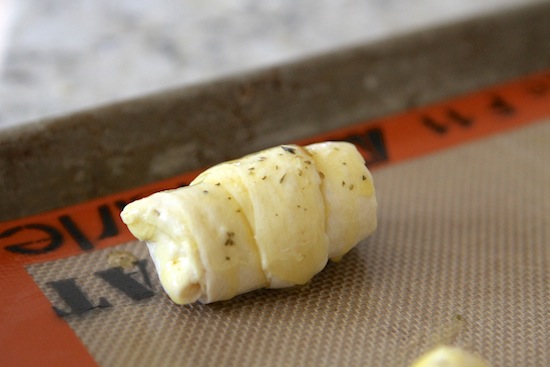
7) Gently roll the turnovers so they form an open ended cylinder. Repeat the same with the remaining filo. And place them on a baking tray.

8) Bake the turnovers for 15 minutes until they are golden brown and crispy. Serve them hot.


Monday, October 19, 2015

Hassleback Garlic Cheesy Bread

Once the temperatures cool and the leaves begin to fall, most people gravitate towards soups and stews for cozying up and I am no different.  We’ve already had made soups an integral part of our menus now and the pleasant days ahead do demand more comfort foods.  Sometimes however, when afternoons turn warm and those vibrant fall leaves glisten in the sunlight, I crave a crisp autumn salad with some cheesy bread.

Sometime last year during blog-hopping, I came across these hassle back breads that I could not resist to try them out. The garlic flavor is so wonderful and I especially love the combination of it with butter and cheese.  I’ve been eating them after sprinkling them with some oregano for a more Italian flavor.  This version has become my favorite. You can toss up a quick green salad as a side and enjoy these breads. Sometimes I convert a readymade bread or baguette also into a hassle back cheesy version only to enjoy the flavors.

I was tempted to bake last weekend but I must admit that I still have not piled my refrigerator with the basic baking ingredients after my recent Haj trip only because I thought of saving this month's comfort food budget and living economically . But this is only for a while. When the new month knocks at us, I will be my usual self and will get back to my cooking habit. But then this recipe that I am posting today is from my drafts. Because I had made it at least twice before I left for my Haj break.

So its cheese and garlic again. Perfect for the autumn days and the aroma that it creates is divine. I keep wondering why people crib over cheese and call it rich in fat. Low fat cheese is widely available in most supermarkets and is a great substitute for the recipes that call for a wide varieties of cheese in them. And Garlic is a popular flavor now loved by everyone which produces a gourmet taste when combined with butter or Cheese. Most recipes these days call for garlic in them whether they are breads or pizzas or pasta or curries.

The recipe for Hassleback Garlic Cheesy Rolls is as below:


INGREDIENTS:

1 tsp Instant yeast 
1 tsp honey
1 teaspoon Salt
3 cups all-purpose flour
Olive Oil, for Greasing Surfaces
1 cup White Cheddar, Or Any Other Cheese You Prefer
½ cups Garlic Butter
 

HOW TO MAKE:

 
1) In a large bowl, stir yeast, honey salt and the flour. Add warm water and mix it to form the dough. Knead well till soft but not sticky. Keep aside for the dough to rise - around 1 hour or so until doubled in size.

2) Punch down dough and knead with some more oil and then cut into two equal portions.

3) Form into two long baguettes the length of the cookie sheet. Give it some twists so that it keeps its length and doesn’t shrink. Cover with plastic wrap and rise 30 minutes.

4) Start to preheat oven to 400 degrees F and  put the bread into the oven and bake 20 minutes at 350 degrees F.

5) In the meantime, slice the cheese into thin slices and melt the butter.

6) Pull loaves of bread out of the oven after 20 minutes and brush with the melted garlic butter. Bake another 5-7 minutes or until bread begins to turn a golden brown. Remove from oven and cool 15 minutes.

7) Cut 1-inch slices 3/4′s of the way through the loaves. Brush garlic butter in between each slice and fill with a slice of cheese.

8) Bake another 3-5 minutes or until cheese is completely melted. Serve HOT after sprinkling some herbs on the tops.


Monday, August 24, 2015

Chicks in a blanket

This is arguably the most loved appetizer at our home now. Even for a non-sausage lover like me, this is an amazingly satisfying dish because it tickles every taste bud on your tongue, the sweet, sour, salty, spicy. We have eaten it many a times from the bakeries here. I never imagined that they could be so easy to make at home.

I found a few perfect recipes from the internet with little substitutions to make. Undoubtedly, Yeast plays the most important role here. It is wholly responsible for the soft and fluffy texture of the bun wrapped around the sausage. I bought sausages from the store. You can also buy ready-made crescents and wrap them round the sausages. But I preferred the home made versions. And it was a great option.

Serve them with a sour cream dip and you will not be able to stop yourself from clearing the plate.  It is a match made in heaven. For a family favorite appetizer like this that can transform your table into an extraordinary spread, you must not delay in trying it out.


Recipe follows

INGREDIENTS:

For the Dough:

1 cup Flour
1 tsp Instant yeast
1/2 tsp Salt
1/2 tsp sugar
1 tbsp oil/ melted butter

For the Filling:

4 Sausages (chicken or beef or mutton or veg)
2 tablespoons salted butter
1/2 teaspoon Italian seasoning
1 small clove garlic, minced
 

HOW TO MAKE:

1) Preheat oven to 375 degrees. Line baking sheet with parchment paper or silicone baking mat and set aside.

2)  In a mixing bowl, add flour, salt , yeast and mix well to form a soft dough. Add in the Oil and knead for 5 min. Let it sit for 30 min or until it doubles in size.

3) While the dough is resting, you can make the garlic butter. In a small bowl, melt butter together with Italian seasoning and garlic. Keep aside.

4) Punch the air out of the dough and knead for 5 min. If the dough is very sticky, you can use very little flour and mix well. Make a smooth dough.

5)  Make small balls from it and roll out each ball into thick circles. With a knife or a pizza cutter, you can cut the circle into 4 equal quarters.
 
6) Separate each quarter from one another. Now they resemble triangles with one circular edge.
 
7) Brush the tops of the quarters with some garlic butter. Place half a sausage at the wide end and roll up.
 
8) Arrange in a foil lined tray. Let it rest for 30 more min or until they double in size. Repeat the same for all the rolls. Brush all of them with more garlic butter.
 
9) After they double in size, bake them in an oven till light golden brown.
 
10) Serve them warm with sour cream or Ketchup.
 
Note : If you find your baked buns or rolls hard or crispy on the outside, you have to cover them with a wet clean towel soon after they are out of the oven. After 10 minutes, you will find them softened.
 

Sunday, August 16, 2015

Cheesy-Stuffed Garlic Butter Rolls

Last weekend I utilized some time for practicing the art of bread making. I realized that the best breads come with some good practice and passion. And it totally depends on the dough and the way it is kneaded, good quality yeast and the rising time for the dough. The rest of it is terribly easy-cheesy.

Now I am posting a tried and tested recipe for a perfect appetizer which can be every bread lover's dream. It is light, it is kiddish, it is flavorful and a popular finger food now. Oh yes, It is cheesy also because it combines butter, cheese and some garlic seasoned alongside with a dash of Italian spices.

The Cheesy-Stuffed Garlic Butter Rolls are ooey-gooey and delicious, they will upgrade your tea time table to higher levels with their presence. You can enjoy them with a sour dip and you will realize that they are tastier than the bakery stuff.

Now on to the recipe:


INGREDIENTS:

For the Dough:

1 cup Flour
1 tsp Instant yeast
1/2 tsp Salt
1/2 tsp sugar
1 tbsp oil/ melted butter

For the Filling:

4 string cheeses, cut in half
2 tablespoons salted butter
1/2 teaspoon Italian seasoning
1 small clove garlic, minced

HOW TO MAKE:

1) Preheat oven to 375 degrees. Line baking sheet with parchment paper or silicone baking mat and set aside.

2)  In a mixing bowl, add flour, salt , yeast and mix well to form a soft dough. Add in the Oil and knead for 5 min. Let it sit for 30 min or until it doubles in size.

3) While the dough is resting, you can make the garlic butter. In a small bowl, melt butter together with Italian seasoning and garlic. Keep aside.

4) Punch the air out of the dough and knead for 5 min. If the dough is very sticky, you can use very little flour and mix well. Make a smooth dough.

5)  Make small balls from it and roll out each ball into thick circles. With a knife or a pizza cutter, you can cut the circle into 4 equal quarters.
 
6) Separate each quarter from one another. Now they resemble triangles with one circular edge.
 
7) Brush the tops of the quarters with some garlic butter. Place half a string cheese at the wide end and roll up.
 
IMG_0482


IMG_0473
 
8) Arrange in a foil lined tray. Let it rest for 30 more min or until they double in size. Repeat the same for all the rolls. Brush all of them with more garlic butter.
 
9) After they double in size, bake them in an oven till light golden brown.
 
IMG_0486
 
10) Serve them warm with sour cream or Ketchup.
 
Note : If you find your baked buns or rolls hard or crispy on the outside, you have to cover them with a wet clean towel soon after they are out of the oven. After 10 minutes, you will find them softened.


Tuesday, June 9, 2015

Pizza Dough and Cheese Sauce

Last week, in the height of me feeling like shit, a glorious idea struck me for a homemade pizza from scratch. It was a Thursday and the evening was supposed to be light with only dinner work. Dominos Pizza's advertisements lay somewhere in the scrapped newspapers and their latest Cheese burst pizza looked mouth-watering.

Hubby is already a long term fan of these pizzas anyway so was literally pleased with the whole idea of spending the evening making this delight as I searched out for a cheesy pizza recipe from the Internet. The Cheese sauce was the most exciting part of our preparation and it added a relishing dimension for our homemade pizza. It's been fun trying out various toppings and I've taken some lovely photos to inspire you to do the same. Please let me know what you like or any other ideas you have.

You would be crackers to not try one of these toppings. You will also realize that pizza making is quite an effortless task and its fun to the core.


INGREDIENTS:

For the Pizza Dough:

2 cups All Purpose Flour
1 tsp Instant Yeast
1 tsp Sugar
1 tbsp Olive Oil
Salt to Taste
1 cup warm water

For the Cheese Sauce:

1 cup Grated Cheddar Cheese
3/4 cup milk
1 tbsp Cornflour
Salt to taste

For the Pizza Sauce:

2 cups tomato paste
2 tsp Olive Oil
2 tbsp finely chopped garlic
1 tbsp each Chopped basil, dry oregano, salt and pepper
1 tbsp Onion powder (optional)

 For the toppings: (few of the following depending on your choice and how you like to make your pizza)

1/2 cup Bell peppers colored and julienned or cut in rounds
1/2 cup Onion rounds
1/2 cup Tomatoes/ Sun dried tomatoes
1/2 cup Mushrooms
1/2 Cup boneless chicken strips (1 inch size)/ leftover grilled chicken/ meatballs
1/2 cup Sliced sausages or pepperoni
4-5 Jalapenos
1/2 cup olives sliced
Oregano
Grated Mozzarella Cheese
Ranch Sauce (optional)

HOW TO MAKE:

The Cheese Sauce:

1) Grate cheese in a bowl and sprinkle corn flour over it. Toss well and set aside.

2) Bring milk to a boil in a sauce pan. Add in the cheese and mix well slowly on low heat.

3) As it smoothens and melts, add salt if needed.  Serve as dipping sauce or cheese spread for sandwiches or stuffing in pizza.


The Pizza Dough:

1) Take the flour in a bowl and mix in the yeast, sugar, and salt.

2) Add water to this and mix into a soft dough.

3) Apply oil all over it generously and cover it. Cover it with a damp cloth and Set this aside in a warm place till it doubles in size( for about 1 hour).

4) When it doubles, knock out the air and knead the dough for 3 min. Add extra flour if you need.

5) The dough which you make should be very soft and slightly sticky before the first rise, once it is risen then add more and knead to a soft dough. This ensures that the pizza base turn crispy and chewy.


The Pizza Sauce:

1) Heat Oil in a saucepan and add in the rest of the ingredients.  Cook it on a very low flame till it is thick and the tomatoes color have changed. About 20 minutes.


The Pizza:

1) Place a medium sized ball of the dough on a flat surface dusted with some flour.

2) Using your hand flatten it in such a way that it resembles the pizza base.( Rectangular or Round)

3) Spread some pizza sauce or Cheese sauce over it. You can use any one of the above sauces.

4) Sprinkle the toppings depending on your choice.

5) Sprinkles oregano and mozzarella cheese on top of the toppings.

6) Bake this in a preheated oven at 200 degrees Celsius for 10-15 minutes. Do not allow the base to harden. It hardens when you overcook the pizza in the oven.


For Cheese Burst Pizza:

1) Place a medium sized ball of the dough on a flat surface dusted with some flour.
 
2) Using your hand flatten it into a thin crusted base.
 
3) Spread some Cheese sauce over it. Keep it aside.

4) Place another medium sized ball of the dough on a flat surface dusted with some flour.
 
5) Using your hand flatten it into a thin crusted base. Place this base on top of the cheese sauce base and seal it in the edges.

6) Spread some pizza sauce over it. Sprinkle the toppings depending on your choice.
 
5) Sprinkles oregano and mozzarella cheese on top of the toppings.
 
6) Bake this in a preheated oven at 200 degrees Celsius for 10-15 minutes.


Thursday, May 7, 2015

Potato Garlic wedges

I cant even begin to explain how incredibly beautiful the weather was yesterday afternoon when it turned all cloudy and dark with howling winds giving everyone a strong feeling of rain.  And just when we began to get the smell of rain, it was like as if we were woken up from a blissful dream.

It was late in the evening when we realized that the sky had turned blue and the rain clouds had drifted away from our city. And that meant the weekend was going to be another normal one. Well, nothing exciting coming up so I am back to my old weekend plans of some cooking and friends and evenings outdoors for strolls and fresh air.
To make the evening more charming, I decided to make some hot fries thinking that it would rain and we could enjoy them watching the rain from the balcony. And that is why I went on to try out the potato wedges which I usually don't remember to make because we always have them when we dine out for pizzas.

I was lucky to find an interesting version for this recipe and instead of frying them, I baked them. They turned yummy with the seasonings used and when paired with the chilli mayo dip, it was a heavenly snack for a pleasant spring evening.

INGREDIENTS:

8 garlic cloves, minced or grated
6 tbsp extra virgin olive oil
2 potatoes each cut into 12 wedges parboiled.
3 tbsp. cornflour
1 tsp salt
1 1/2 tsp freshly ground black pepper
½ tsp garlic powder
1/4 tsp red chilli powder


HOW TO MAKE:
  1. Combine the garlic and oil in a large bowl, warming it until the garlic is fragrant, about 1 minute.
  2. Transfer 5 tablespoons of the oil (leaving the garlic in the bowl) to the baking sheet, coating it well.
  3. Add the potatoes to the bowl with the garlic mixture and toss to coat. Microwave the potatoes with this mixture for 90 seconds.
  4. Combine the cornstarch, salt, pepper, garlic powder, and cayenne in a small bowl. Sprinkle over the hot potatoes and toss well to coat.
  5. Arrange the potatoes in a single layer on the prepared baking sheet and bake, turning once, until deep golden brown and crisp, 30 to 40 minutes.
  6. Serve with ketchup, mayo or sour cream.

For the chilli mayo dip, you can remove some mayo (3 tbsp) in a small bowl, add grated garlic, chilli sauce or ketchup (1 tsp) and a few drops of water and mix well to get a smooth paste.


Sunday, April 19, 2015

Chicken Enchildas

Another Mexican favorite makes its way on my space and I swear this is one will make you go loco for food.  This is a great recipe for a quick dinner. There aren't many ingredients and doesn't take much time!

Nothing is as quintessentially Mexican as an Enchilda. The baked wrapped rolls filled with the most delicious filling and topped with white or red sauce and not to forget the cheese melted on it and oozing out. I tried out 2 types of Enchildas and both were truly delicious. One with the white sauce and the other with the red sauce.

So now declare an Enchilda night and serve this out for a family reuinion. You will find the results blissful and joyful.

INGREDIENTS:

White Chicken Enchiladas

 8 flour tortillas, soft taco size
2 cups cooked, shredded chicken
2 cups shredded cheese
3 Tbsp butter
3 Tbsp flour
2 cups chicken broth
1 cup sour cream
1 diced green chilies

HOW TO MAKE:

1) Preheat oven to 350 degrees F.

2)  Mix chicken and 1 cup cheese. Roll up in tortillas and place in a square pan seam side down.

3) In a small sauce pan over medium heat, melt butter.  Whisk in flour and cook 1 minute. Add broth and whisk until smooth. Allow sauce to thicken.  

4) Remove from heat and stir in sour cream and chilies.

5)  Pour sauce over enchiladas and top with remaining cheese.

6) Bake 20-25 minutes and then broil for a few minutes to brown the cheese.


Red Sauce Chicken Enchiladas

1 medium onion, diced
1 jalapenos, seeded and chopped fine
1 tsp oil
3 cloves garlic, minced
3 Tbsp chili powder
2 tsp cumin
1 Tbsp sugar
2 tomato's  puree
1 cup water
Salt and pepper
3 cups cooked chicken breast, shredded
2 cups shredded cheddar cheese, divided
6 (8-inch) tortillas


HOW TO MAKE:

1)  Preheat the oven to 425 F.

2) Heat oil in a large saucepan over medium high heat. Add onion and jalapeño and cook until soft.
  
3) Stir in the garlic, chili powder, cumin and sugar, and cook just until fragrant, about 30 seconds.

4)  Mix in the tomato sauce and water. Bring the sauce to a boil, lower the heat and simmer until thickened, about 10-15 minutes.

5) Strain the sauce through a large mesh strainer into a medium bowl. Return sauce to pan and stir in shredded chicken. Reduce the heat to low, cover and cook for 10 minutes.

6) Microwave the tortillas for 15-20 seconds, until pliable.

7) Spoon approximately 1/2 cup chicken evenly down the center of a tortilla, top with 2 Tbsp cheese .

8) Tightly roll up the tortilla and place seam side down in the prepared pan. Repeat with the remaining filling and tortillas.

9) Lightly spray the tops of the enchiladas with cooking spray. Cook for 8 minutes.

10) Reduce the oven temperature to 400F.

11) Remove the enchiladas from the oven and pour the sauce oven the top. Sprinkle with the remaining shredded cheese. Cover the dish with foil and bake for 20 minutes.

12) Remove the foil and place under broiler until cheese is bubbly.


Thursday, April 16, 2015

Cheese biscuits

Last weekend I baked again. And this time it was an easy cheesy recipe that I found during blog hopping. These biscuits are perfect for munching as a snack, after your brunch or for an evening tea time. They are a snap to make and we loved the aroma they generated during baking. I particularly loved the way the cheese and the herbs blended with the dough and how the biscuits turned out to be crispy and crunchy and not to forget cheesy. I used tinned cheese for these biscuits. You can use any type of cheese - fresh or frozen or grated or tinned.


INGREDIENTS :

2 cups all purpose flour
7 tbsp cold butter
½ tsp red chili powder
¼ tsp salt
½ tsp carom seeds
½ tsp cumin seed
1.5 tsp baking powder
2 scallions/spring onions finally chopped
1.5 cups grated cheese... you can also add more... (I used tinned cheese)
½ cup buttermilk or milk


HOW TO MAKE:
 
1)  Preheat an electric oven to 190 degree Celsius.
 
2) Sift the flour with baking powder and salt. Add the all the spices and the spice powders and mix well.
 
3) Take butter and chop them in pieces. Mix the butter pieces with your fingertips with the flour till the mixture resembles breadcrumbs.
 
4) Add the chopped scallions, grated cheese  and mix again. Then add buttermilk or milk and knead the whole mixture lightly. Do not over knead.
 
5)  Roll out dough on a floured surface into 8x8 inch square and cut into 2x2 inch squares.
 
6) Bake in the oven for 20-25 minutes or until golden brown. Cool them on a wire rack and you can store them in any air tight container.


Thursday, April 9, 2015

Mini Greek Pizza Muffins

The heart of Greek cooking comes from Kalamata Olives, its spicy blend of herbs and chiles, as well as the feta cheese and their use of olive oil. Once you have those ingredients, you are off to the races for quick, tasty Greek food.

But when I mix them with eggs and milk, then I’ve hit my mojo. And these mini muffins are perfect for a big time healthy breakfast. A bird's eye-view of the ingredients will surely shout that it is a thoroughly balanced meal. These muffins are extremely easy to whip up for a quick and healthy breakfast.

And there is more to it. You can also be bold and add more ingredients like sausage and pepperoni to the egg mixture. Vegetarians can add more colorful vegetables to this and enjoy these savories .
 
Makes 2 dozen mini muffins
 
INGREDIENTS:
2 tablespoons extra-virgin olive oil
2/3 cup finely chopped onion
2/3 cup finely chopped red bell pepper
1/3 cup whole-wheat pastry flour
1/3 cup all-purpose flour
2 teaspoons baking powder
1 1/2 teaspoons chopped fresh oregano or 1/2 teaspoon dried
1 teaspoon sugar
1/4 teaspoon garlic powder
1/4 teaspoon salt
1/3 cup low-fat milk
1/3 cup crumbled feta cheese
1 large egg, well beaten
2 tablespoons tomato paste
2 tablespoons chopped kalamata olives


HOW TO MAKE:
1) Heat oil in a large skillet over medium heat. Add onion and bell pepper; cook, stirring often, until the onion is tender, about 5 minutes. Transfer to a large bowl and let cool for 10 minutes.

2) Meanwhile, preheat oven to 400°F. Coat a mini-muffin pan with cooking spray.
3) Whisk whole-wheat pastry flour, all-purpose flour, baking powder, oregano, sugar, garlic powder and salt in a medium bowl.
4) Stir milk, feta, egg, tomato paste and olives into the onion mixture. Make a well in the dry ingredients; add the wet ingredients and stir until just combined. Fill the prepared muffin cups two-thirds full.
5) Bake the muffins until lightly browned, 13 to 15 minutes. Cool in the pan for 5 minutes before turning out onto a wire rack. Serve warm or at room temperature.


Monday, November 17, 2014

Paneer Dum Style creamy Biryani (Baked)

On a lazy Saturday morning, with the light streaming into my living room just the way I liked it, I toyed with the idea of hitting the kitchen to satiate the craving I couldn’t ignore anymore. The craving was strange  - I could sense that it was for something redolent.... something aromatic and something spicy but sweet also. Very evocative.

I had not yet planned what to make for lunch that day. Still wondering what could be done and browsing through my recipe log picturing the contents in it until I hit my target for the most perfect dish whose ingredients were readily available with me - Paneer Dum Style creamy Biryani baked version.


I know the name sounds unbelievably fancy and seems like it would be a complicated recipe. But rest assured, there are only the regular ingredients in all and it’s not process heavy at all. All ingredients can be locally sourced as well and are usually available in every pantry shelf at home. A perfect choice to mop up the rich dish.

Biryani is a dish that can be prepared in a million ways across borders, without discrimination. and evermore so delicious to eat. India alone has several types of Biryanis varying from region to region. Generations ago, it was the food prepared for only big occasions. With rise in popularity, however, it’s not an unusual sight to see devoted cooks to snap up their favorite flavored biryani every now and then.

Delicious, braised cottage cheese (paneer) is ready in a fraction of the normal cooking time. All in all, the redolent flavors are to die-for.

So the next time you have a dinner party or you have your friends over, do try this recipe, you’ll come out a star. The whole dish looks and maintains a gourmet standard . I wolfed down more than my fair share of the dish was ample proof of how good it was. And the best part is that it doesn't take more than an hour to make this.
 
INGREDIENTS:

250 gm paneer cubes

3 Tbsp  ghee/ clarified butter

2 Tbsp whole spices

1 large onion,chopped coarsely

3 Tbsp butter

2 cups fresh tomato puree

2 to 3 green chillies

3-4 cloves garlic

1 Tbsp ginger, peeled and chopped

1 tsp turmeric powder

1 tsp cumin-coriander powder

1 tsp tandoori masala

1/2 tsp cardamom powder

1 tsp sugar
             
1/4 cup cashew paste

1/2 cup cream  
                                  
Salt to taste                                                          

6 cups cooked Basmati rice

1 cup fried onions

1/2 cup almond slivers

1/2 cup chopped mint and coriander


HOW TO MAKE:
 
1) Sear the paneer cubes in ghee. Then season it to taste and set aside.
 
2) In the same pan, add the whole spices such as cinnamon, cloves, black cardamon, green cardamon, black peppercorns, mace.
3) As the spices crackle, add the chopped onions, green chillies, ginger garlic and fry for 2 minutes.
4) Add the powdered spices  followed by the tomato puree. Simmer for 10 minutes or so.
5) Then add the cashew paste and cream. Season to taste.
6) Add the paneer into the gravy and bring to a gentle simmer for 6 to 8 minutes.
7) Using a greased baking dish or handi, layer the paneer and rice alternatively. Garnish with fried onions, nuts, fresh mint and coriander. Cover with aluminium foil or heat gently for 25 minutes.
8) Serve hot with curds raita and a cucumber salad.

You may also like:

Related Posts Plugin for WordPress, Blogger...